OCI_Cloud_Guard構成
管理用のグループ/ユーザーを作成
とりあえずフル権限はこちら
https://docs.oracle.com/en-us/iaas/Content/cloud-guard/using/policies.htm
グループ作成
Identity & Security > Domains > (OracleIdentityCloudService) > User management タブ > Groups > Create group- Name: cloudguard-admins
- Users: xxxxxxxxxxxxxxxxxxxxxx (既存の適当なユーザー)
ポリシー作成
Identity & Security > Policies > Create Policies- Name: Policy_cloudguard-admins
- Compartment: zzzzzz(root)
- Statements:
allow group OracleIdentityCloudService/cloudguard-admins to manage cloud-guard-family in tenancy
→上記のフル権限与えたユーザーでCloud Guard有効化しようとしたけど権限エラーではじかれたのでテナンシーオーナーでやることにした
権限細かく分けたい場合も一応載っている。知りません。
https://docs.oracle.com/en-us/iaas/Content/cloud-guard/using/prerequisites.htm
You can find all the policies required to enable Cloud Guard in the Oracle Cloud Infrastructure Identity and Access Management (IAM) Common Policies topic. On that page, search for “Cloud Guard” and expand the four lists that you find.
For detailed information on individual Cloud Guard policies, see Cloud Guard Policies.
Cloud Guard 有効化
Cloud Guard はテナンシーレベルで作動し全リージョンが監視対象。
有効化時にReporting Regionを選択して、そこに監視データが集まってくる。
Identity & Security > Cloud Guard
Enable Cloud Guard
※どのリージョンでやっても同じっぽい。
以下のポリシーがCloudGuardPolicies という名前で自動で付与される
→CloudGuard Serviceが監視対象のリソースを触れる権限てことね。
allow service cloudguard to manage cloudevents-rules in tenancy where target.rule.type='managed'
allow service cloudguard to read vaults in tenancy
allow service cloudguard to read keys in tenancy
allow service cloudguard to read compartments in tenancy
allow service cloudguard to read tenancies in tenancy
allow service cloudguard to read audit-events in tenancy
allow service cloudguard to read compute-management-family in tenancy
allow service cloudguard to read instance-family in tenancy
allow service cloudguard to read virtual-network-family in tenancy
allow service cloudguard to read volume-family in tenancy
allow service cloudguard to read database-family in tenancy
allow service cloudguard to read object-family in tenancy
allow service cloudguard to read load-balancers in tenancy
allow service cloudguard to read users in tenancy
allow service cloudguard to read groups in tenancy
allow service cloudguard to read policies in tenancy
allow service cloudguard to read dynamic-groups in tenancy
allow service cloudguard to read authentication-policies in tenancy
allow service cloudguard to use network-security-groups in tenancy
allow service cloudguard to read data-safe-family in tenancy
allow service cloudguard to read autonomous-database-family in tenancy
allow service cloudguard to read log-groups in tenancy
Allow any-user to { WLP_BOM_READ } in tenancy where all { request.principal.id = target.agent.id, request.principal.type = 'workloadprotectionagent'}
Allow any-user to { WLP_CONFIG_READ } in tenancy where all { request.principal.id = target.agent.id, request.principal.type = 'workloadprotectionagent'}
Endorse any-user to { WLP_LOG_CREATE } in any-tenancy where all { request.principal.id = target.agent.id, request.principal.type = 'workloadprotectionagent' }
Endorse any-user to { WLP_METRICS_CREATE } in any-tenancy where all { request.principal.id = target.agent.id, request.principal.type = 'workloadprotectionagent' }
Endorse any-user to { WLP_ADHOC_QUERY_READ } in any-tenancy where all { request.principal.id = target.agent.id, request.principal.type = 'workloadprotectionagent' }
Endorse any-user to { WLP_ADHOC_RESULTS_CREATE } in any-tenancy where all { request.principal.id = target.agent.id, request.principal.type = 'workloadprotectionagent'}
Reporting RegionはTokyoでCompartmentはrootコンパートメントでDetectorは選ばずEnableする
※これ最初だけ画面が違った。オプションも違くなってる。Redwood対応って奴かな。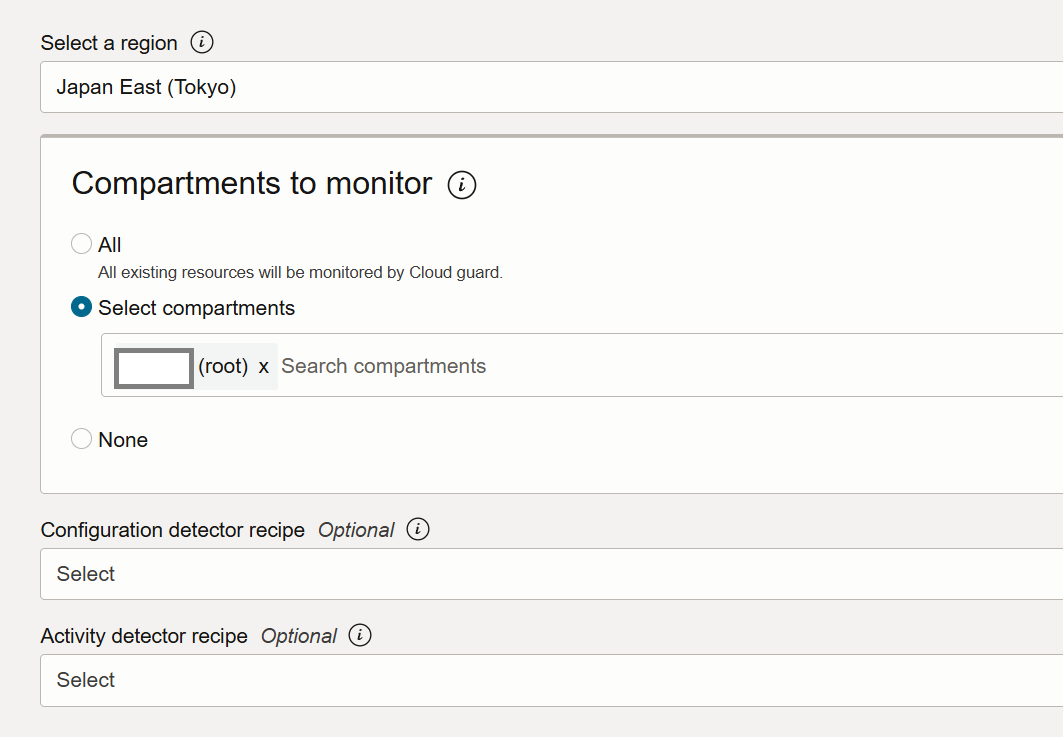
一度無効化して、再度有効化した新しい画面コレ。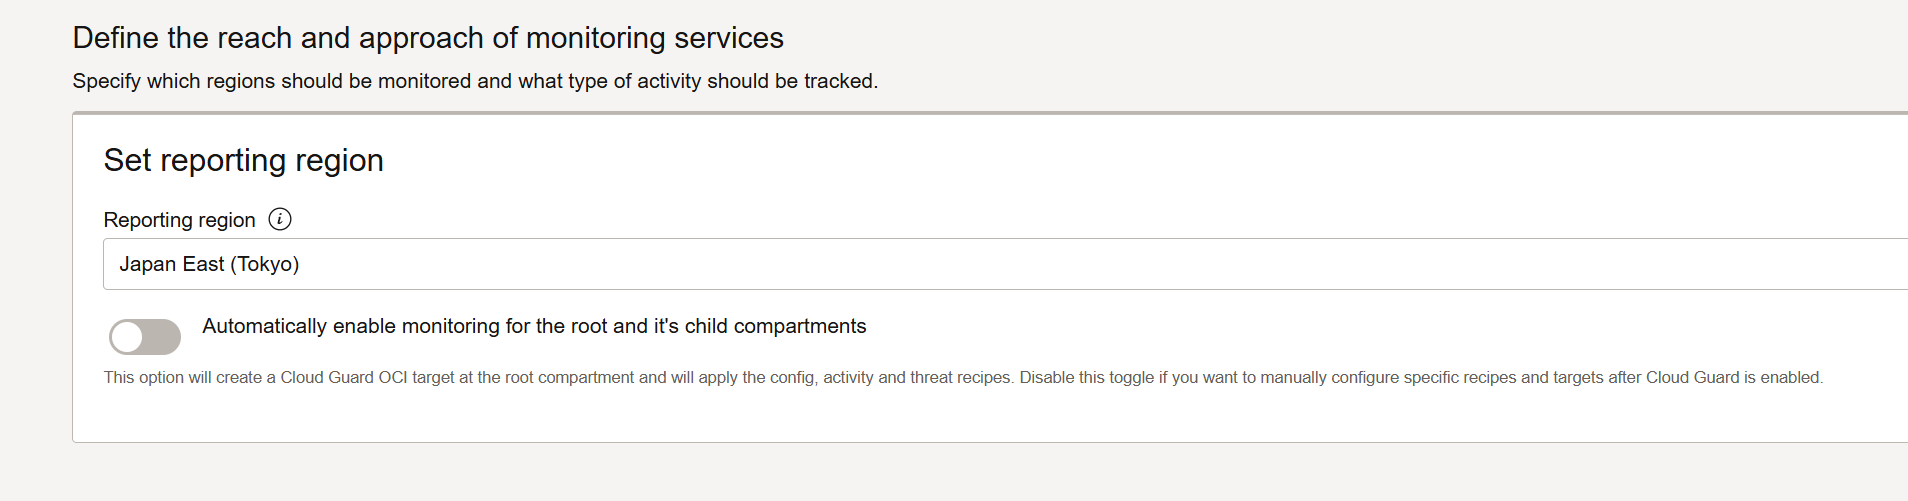
- Detector というのが監視
- Responderというのが修正
まずはDetectorのみ有効化して様子を見る
とりあえずRecipesを全部Cloneした。Compartment はrootで。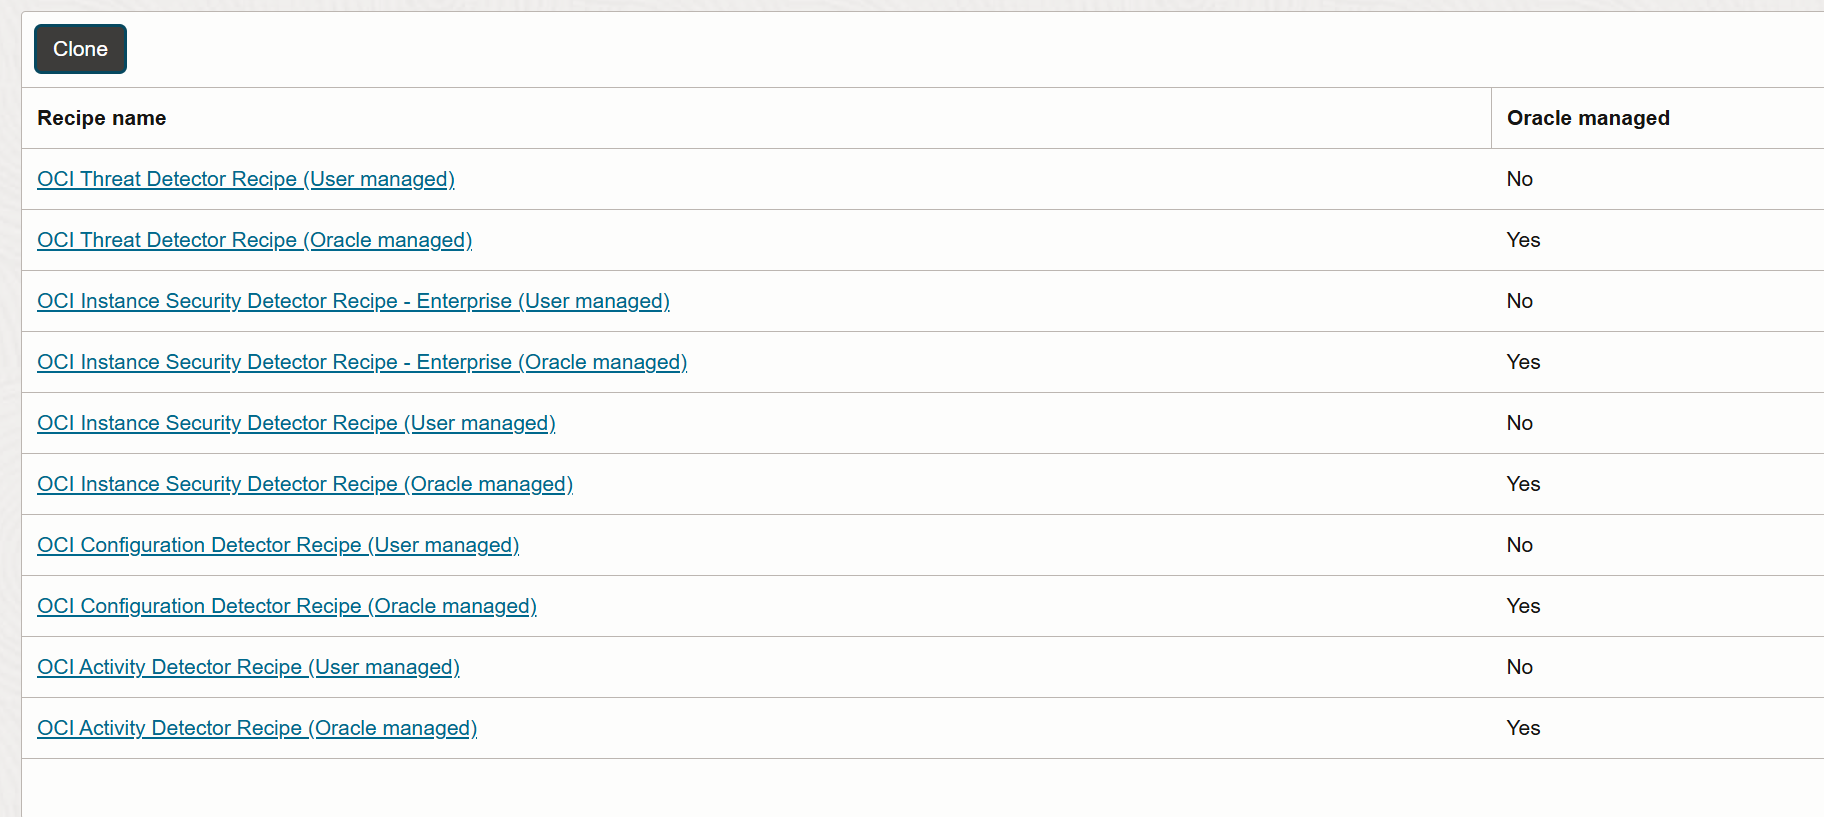

Targetを作る
Cloud Guard > Configuration > Targets > Create Target
- Name: Cloud Guard Target
- Compartment: zzzzzzz(root)
- Responder 以外はcloneして作ったUser managedを設定
- 2025/07/24 追記:OCI Instance Security Detector Enterpriseって有料らしい。Standardは無料らしいのでレシピに付け直す(記事最後)
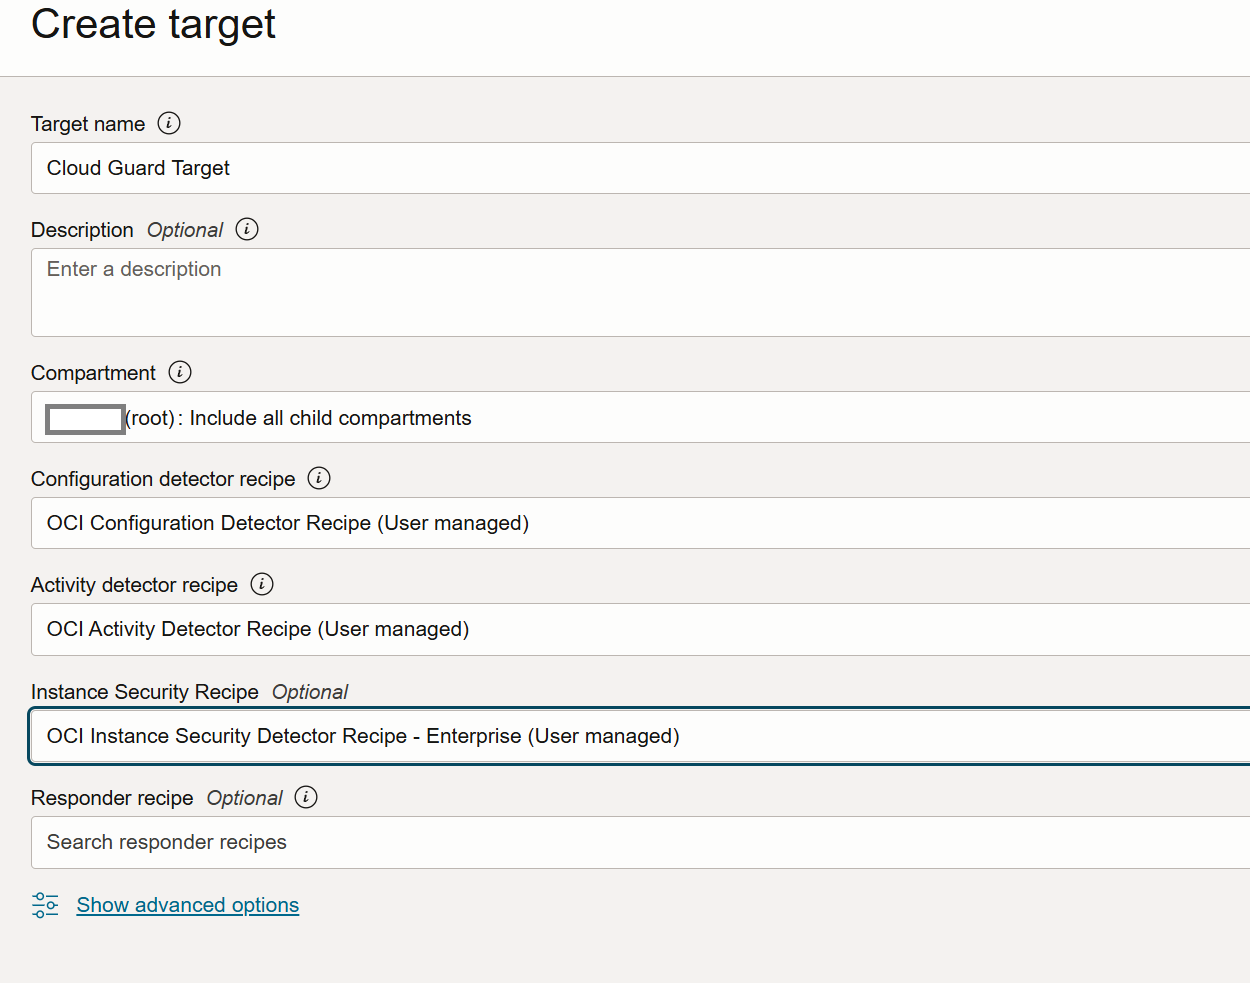
- 2025/07/24 追記:OCI Instance Security Detector Enterpriseって有料らしい。Standardは無料らしいのでレシピに付け直す(記事最後)
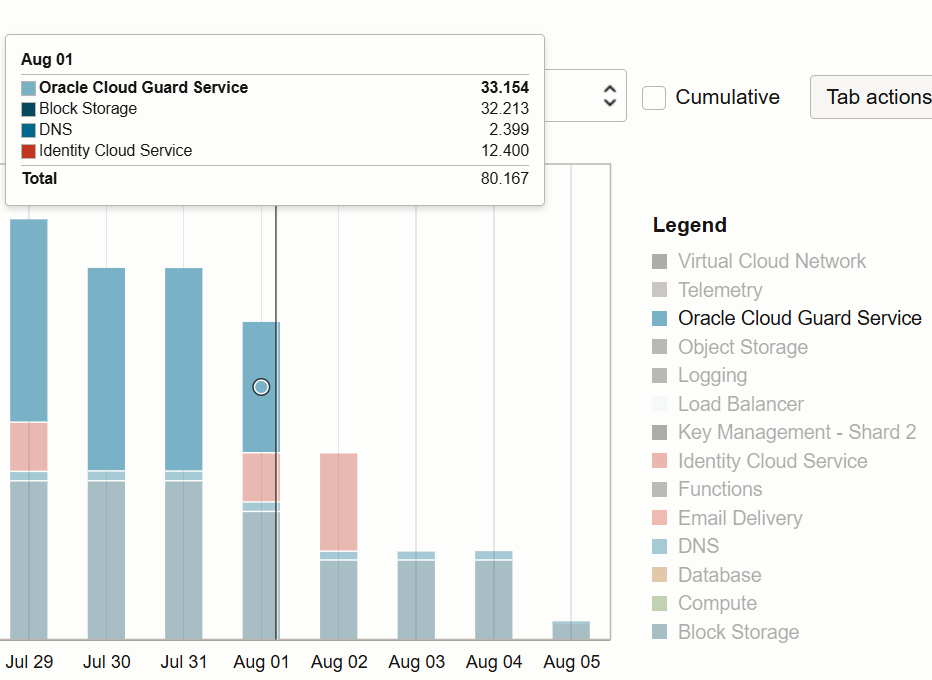
とりあえず有効化してみたけどいつデータが集まるんだろ。。。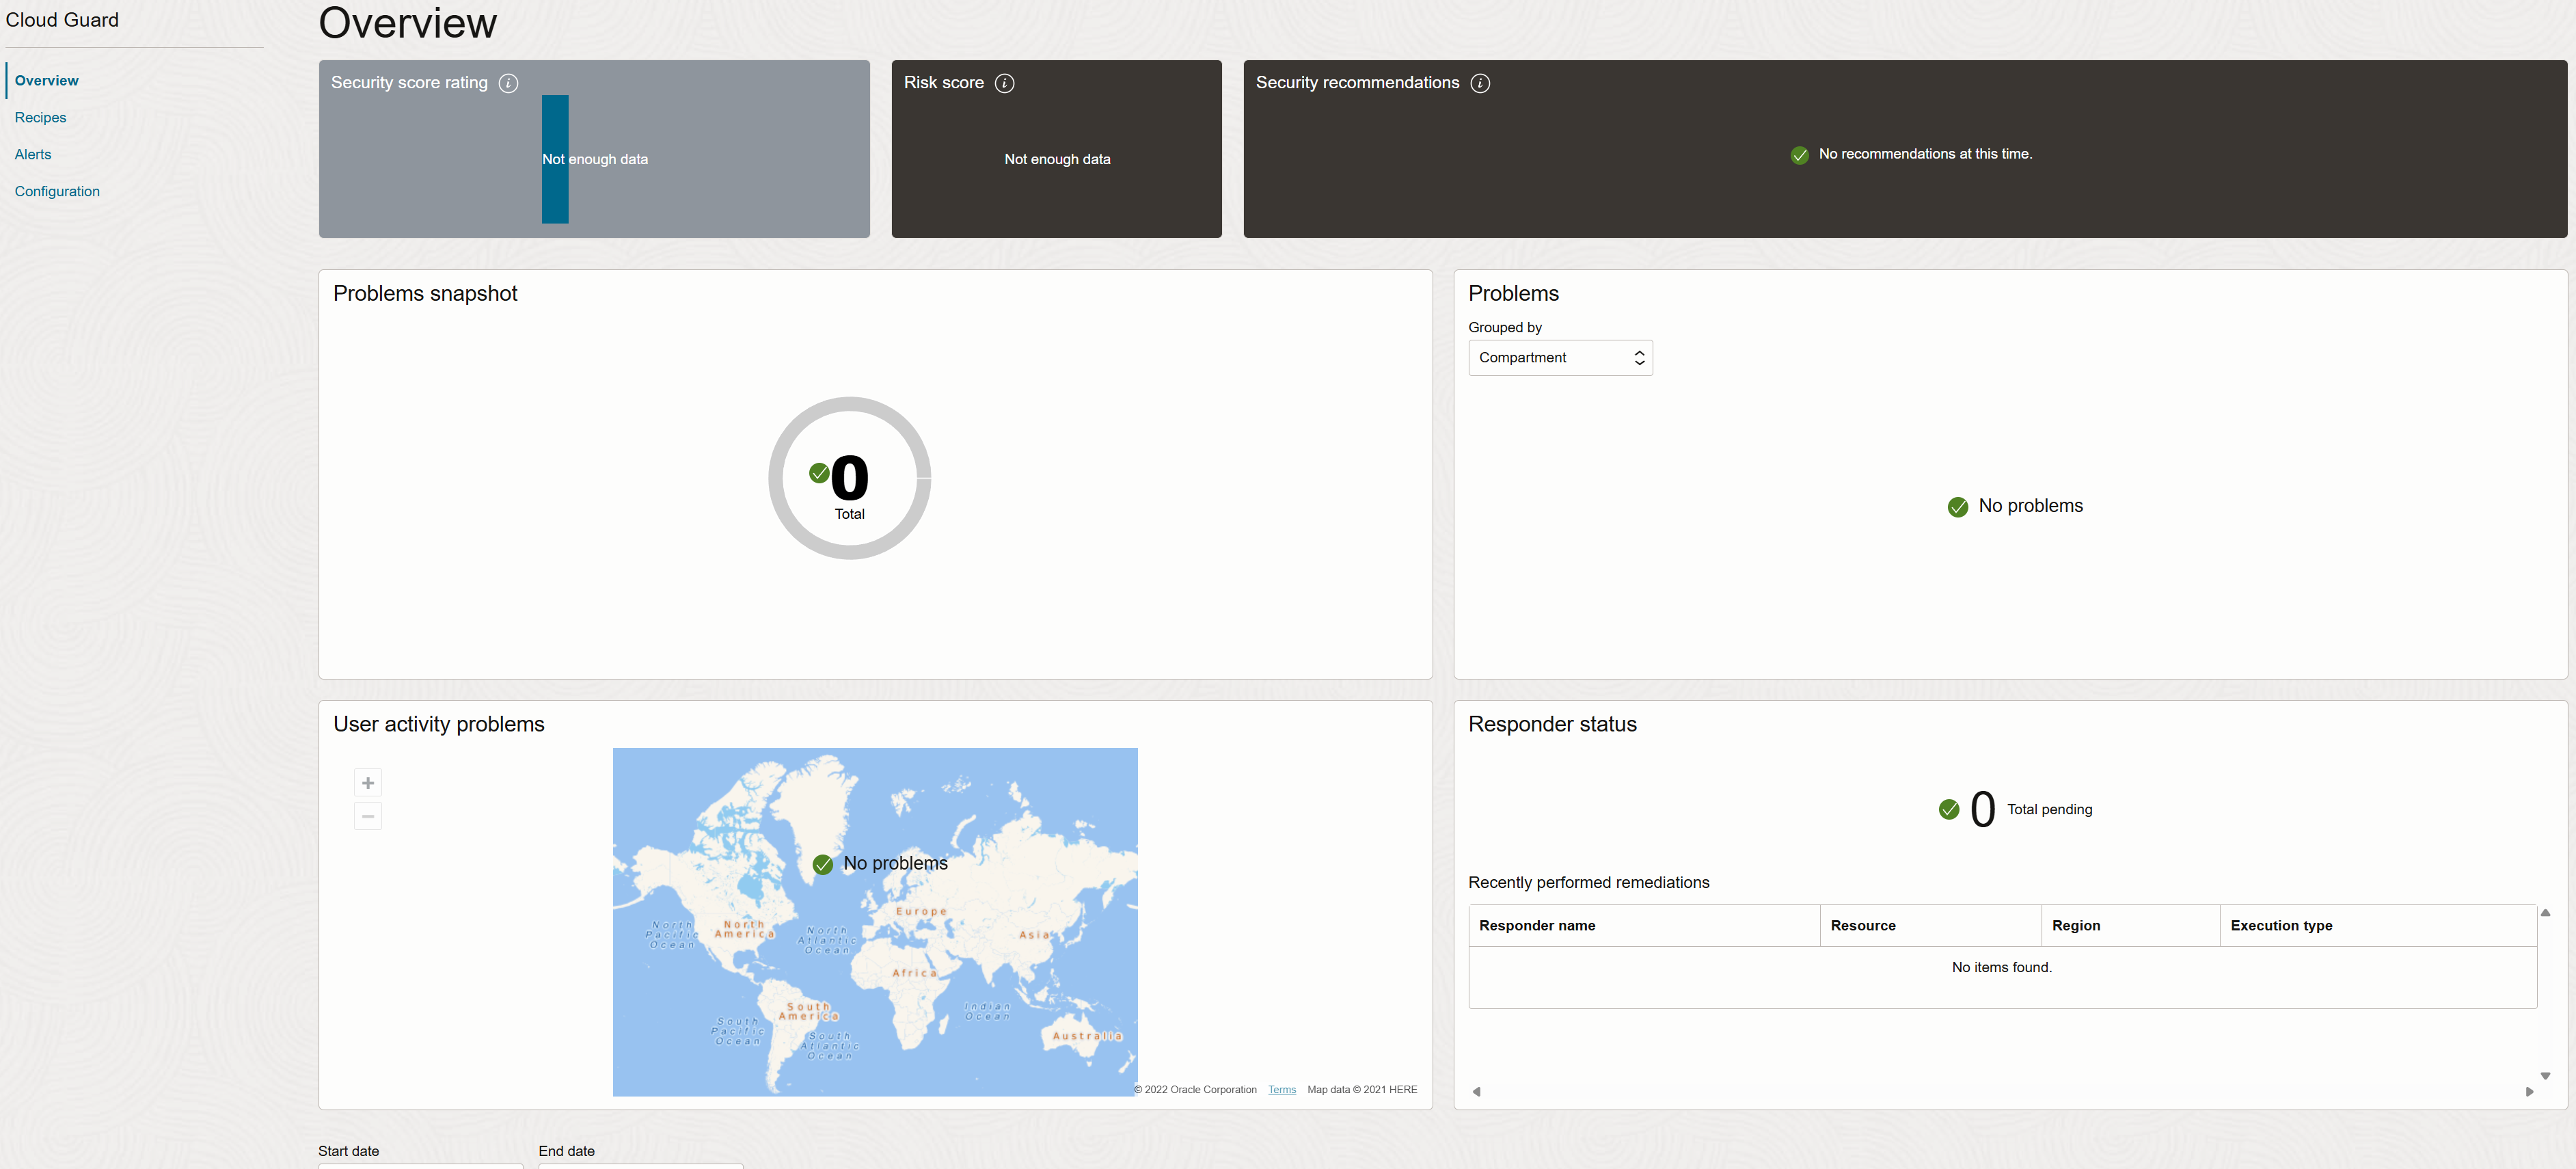
2時間くらいしてみたら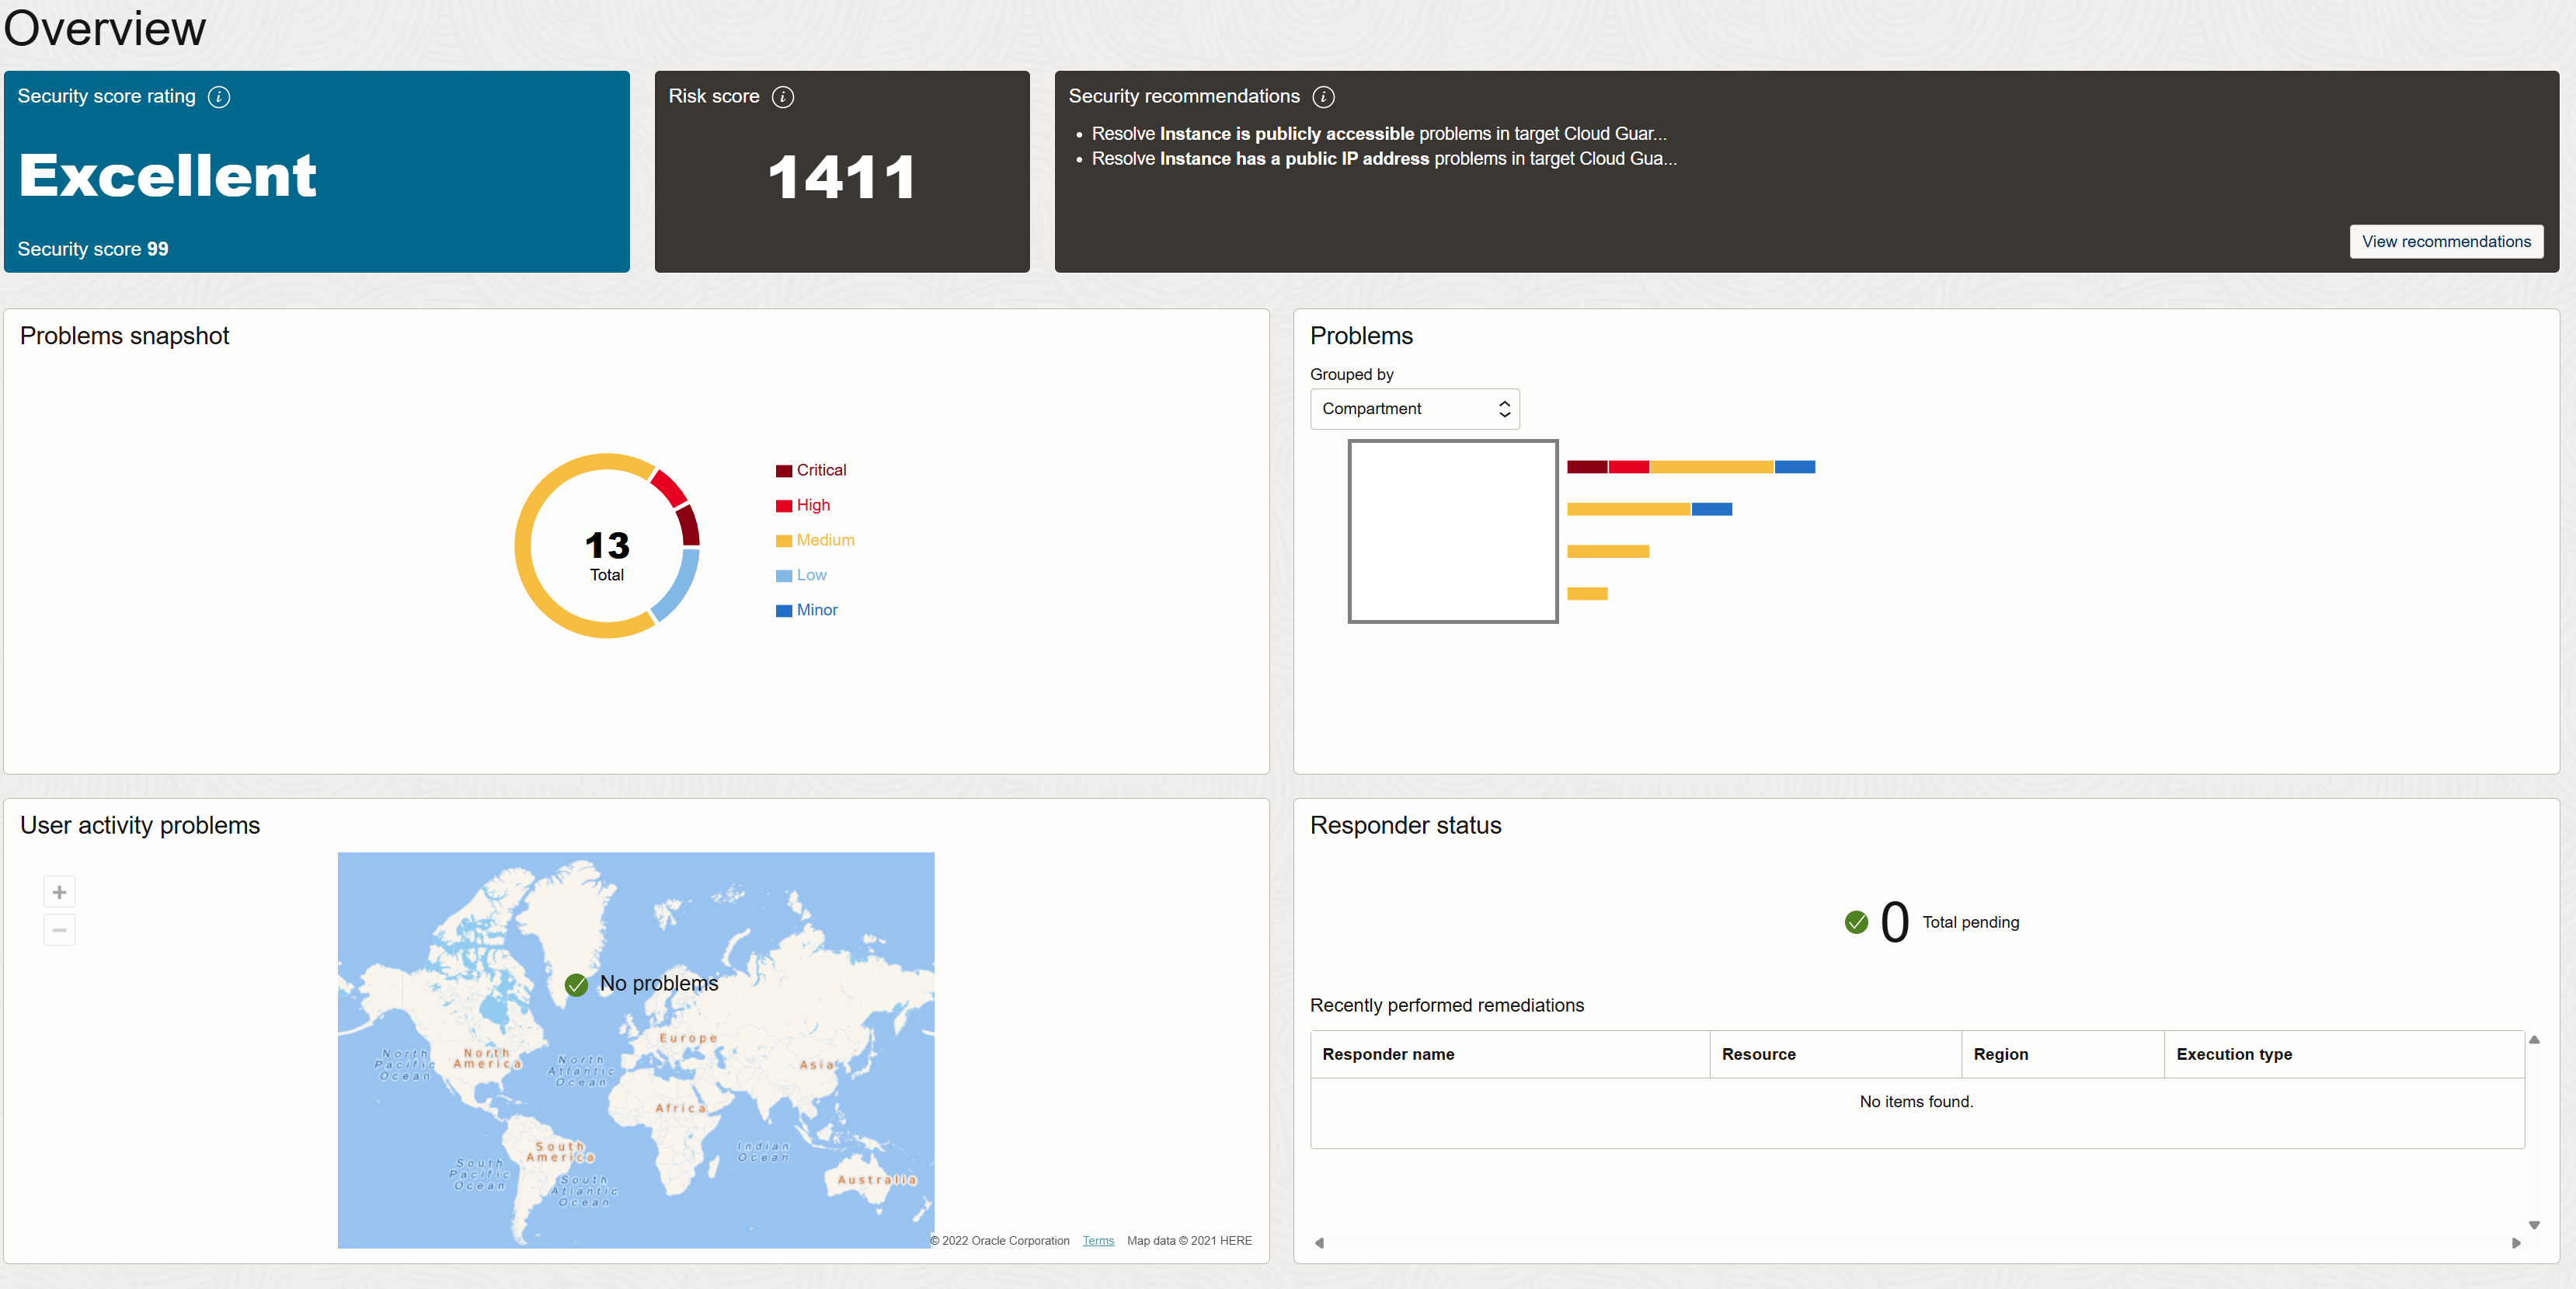
あとあとみたら、Cost Management > Cost analysis の上のほうから、Oracle Clud Advisorとかいうページに飛べて、Cost managementの推奨事項まで表示してくれるっぽい。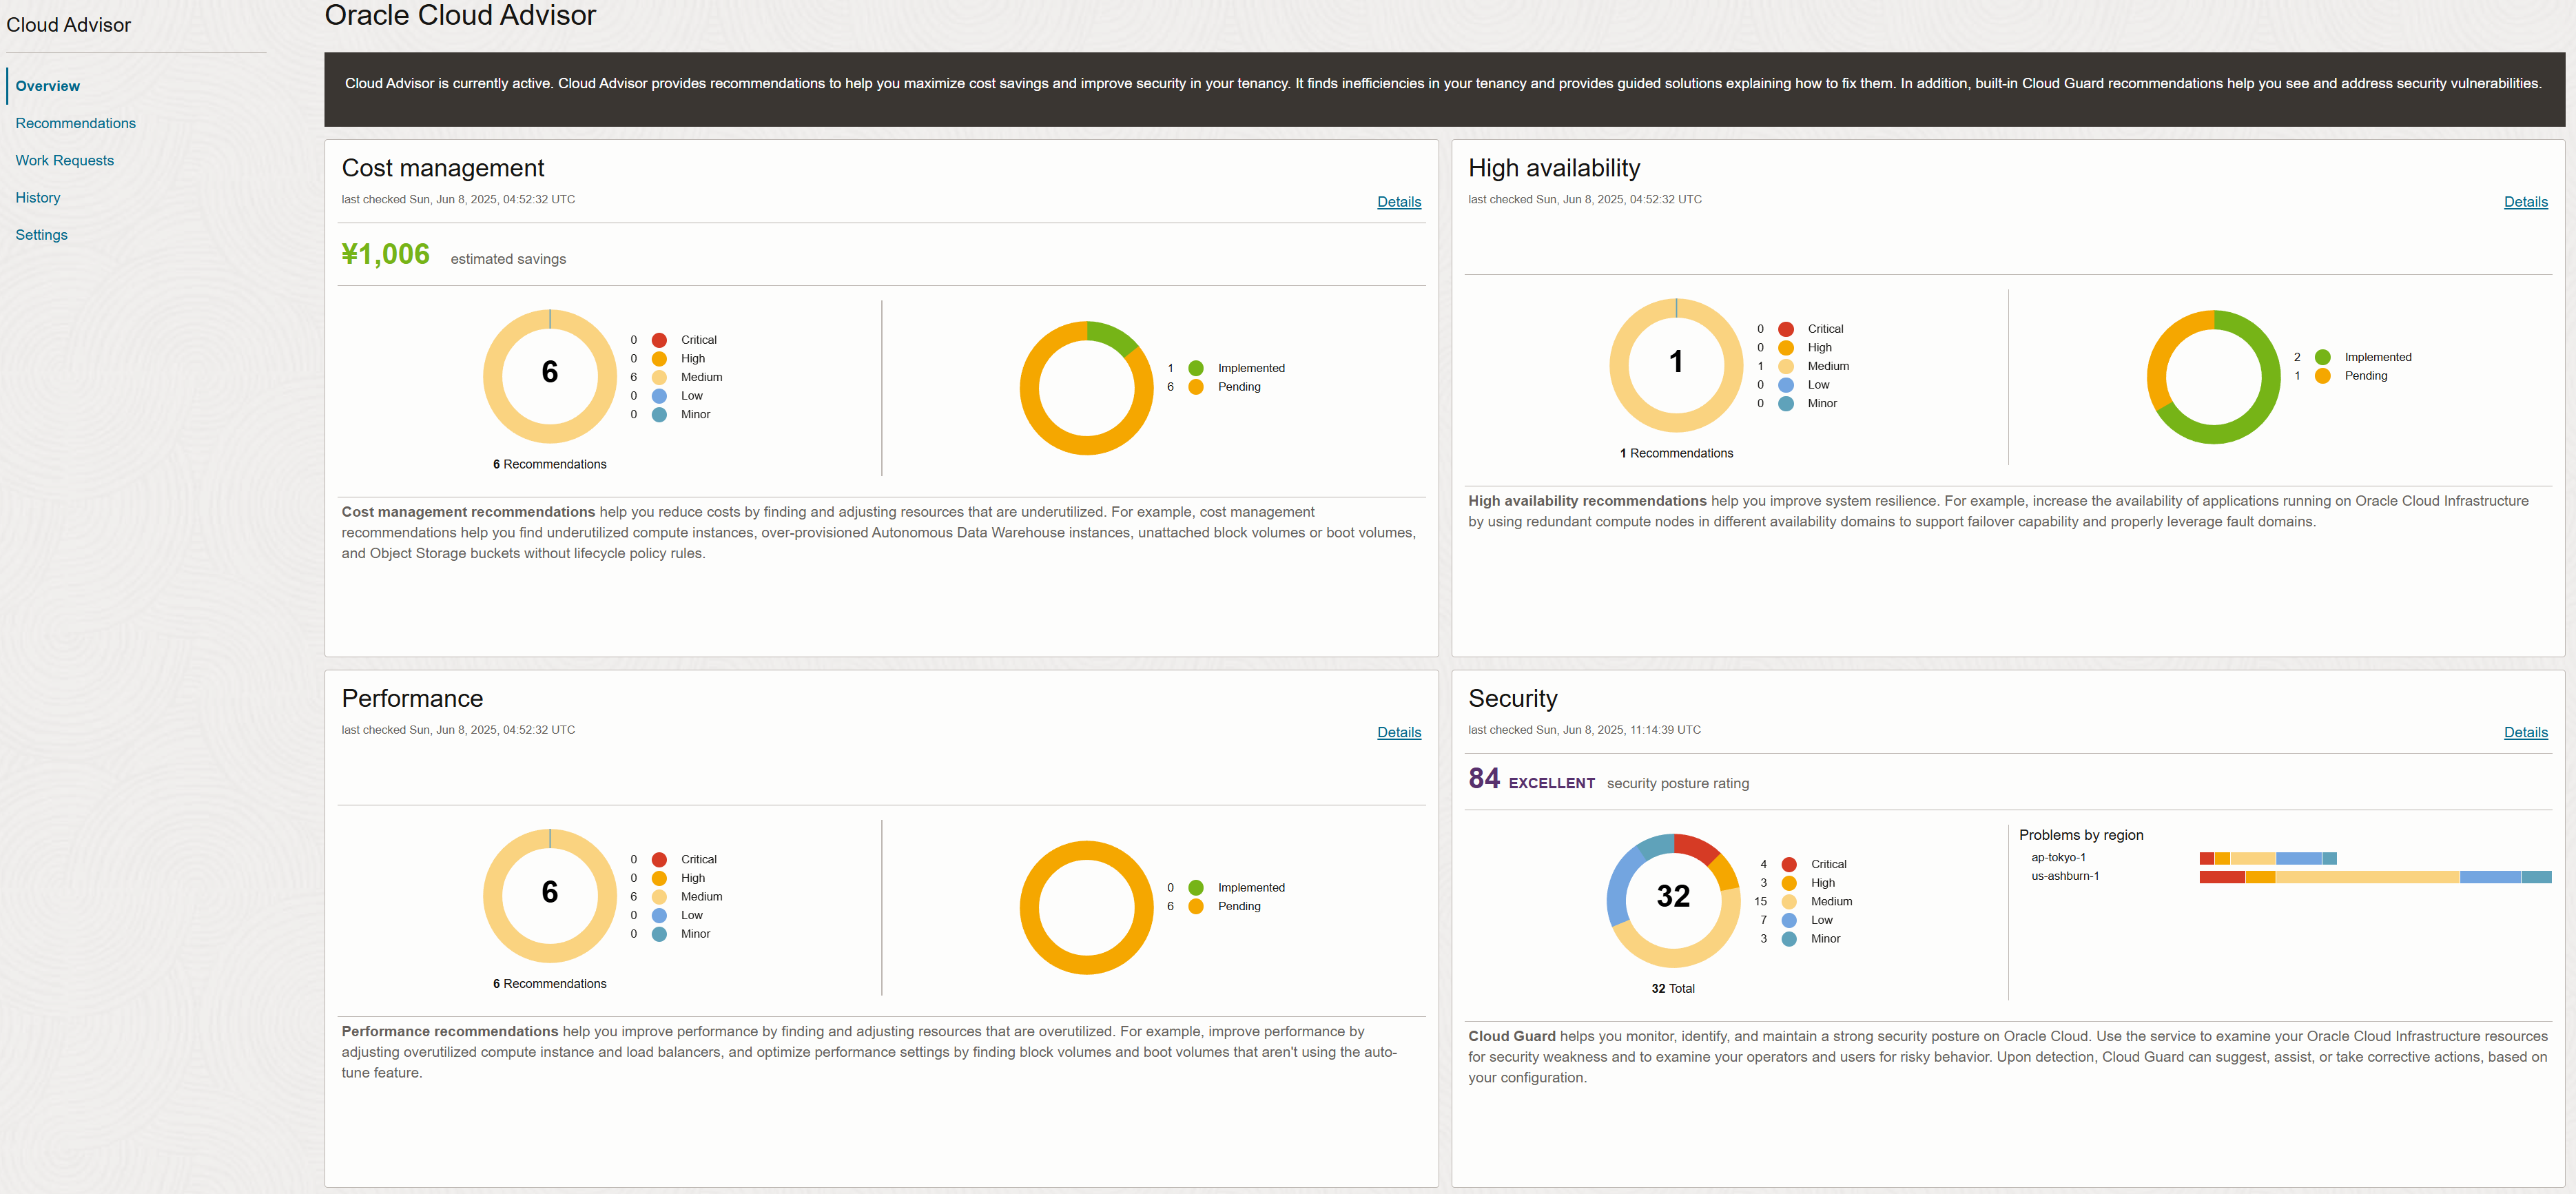
みたら、過去に作って消したCompute InstanceのBoot Volumesが残ってて課金されてるらしい。マジかよ。こういう系もアドバイスしてくれるのね。
すぐには修正できない箇所もあるので徐々に対応して行こうと思う。
Responderはいらんかな。
Instance Security Detector Recipeの変更
2025/07/24追記:
気付いたら金かかってた。
Instance Security Detector Recipe Enterprise とStandardがありEnterpriseのみ金かかるっぽい。何も考えずにEnterpriseを割り当ててた。
→Cloud Guard を有効化した後に作ったCompute Instance で自動で適用されてしまうらしい。今までUbuntu Arm(いろいろAgentが対応してない)を使ってたから金かからなかったのかなとも思ったが、そういうわけでもなさそう?数日様子見る。
数日様子見た結果、Oracle Linux 1台につき25円/日くらいかかる。Ubuntuは通常版とminimal版試したがどちらも金かかって無さそうだった。ちな全部Arm。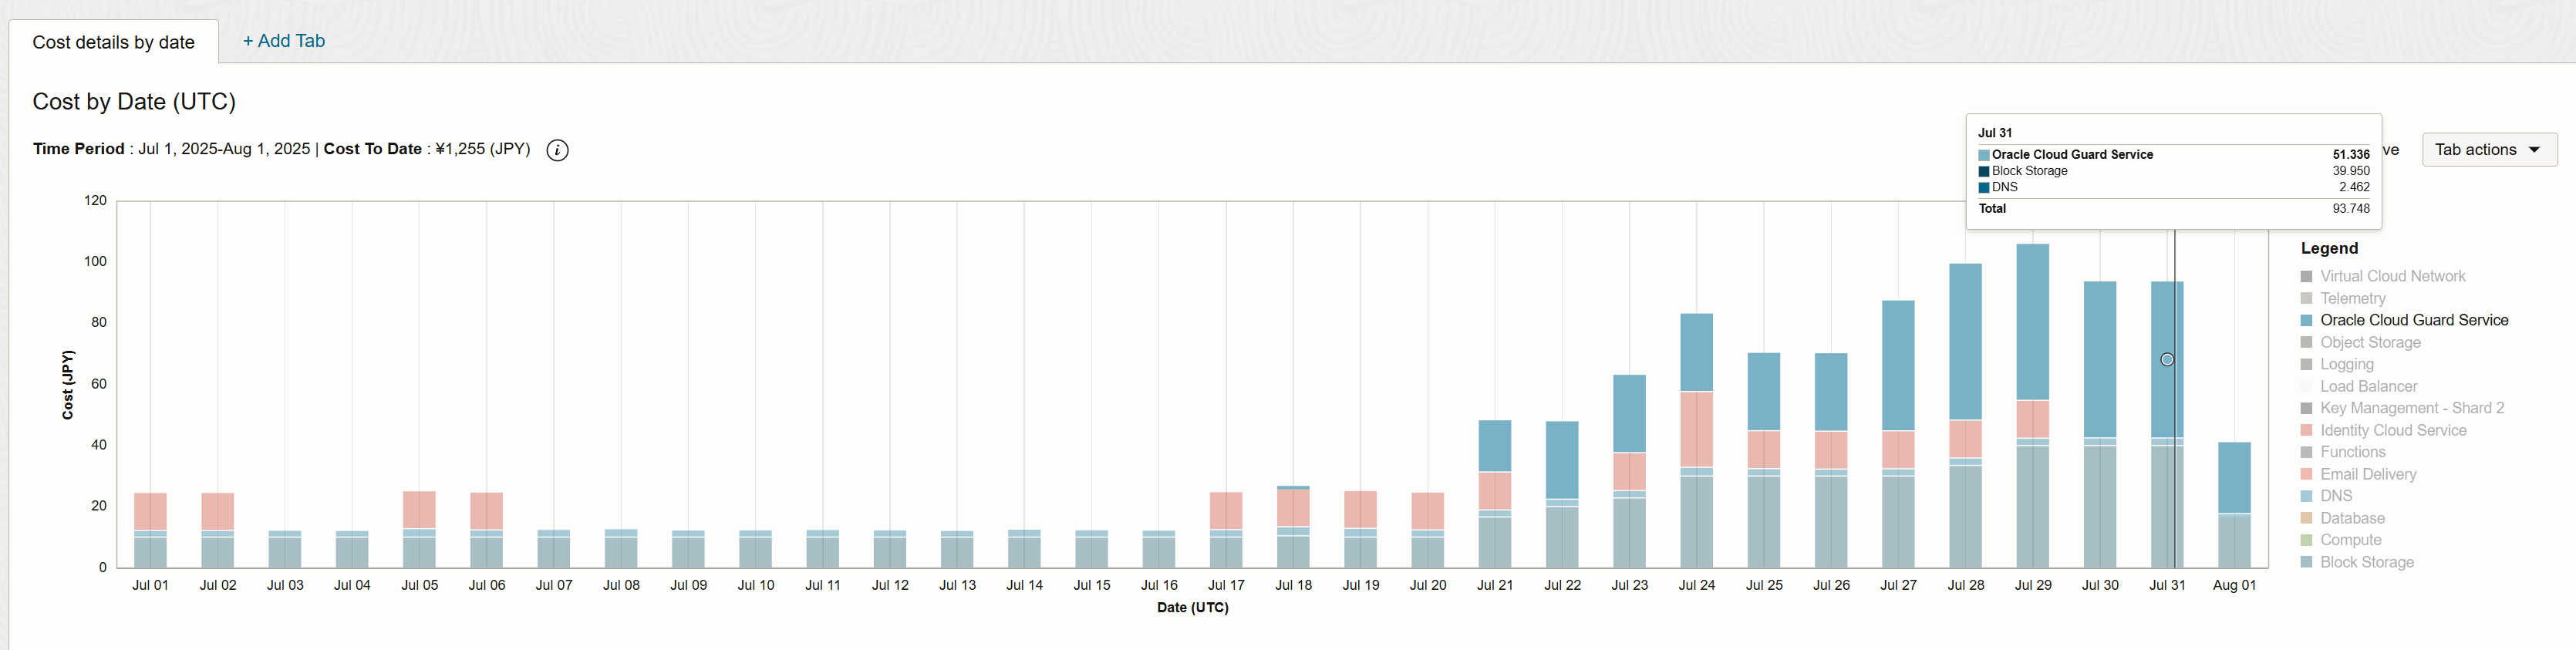
https://www.oracle.com/jp/security/cloud-security/pricing/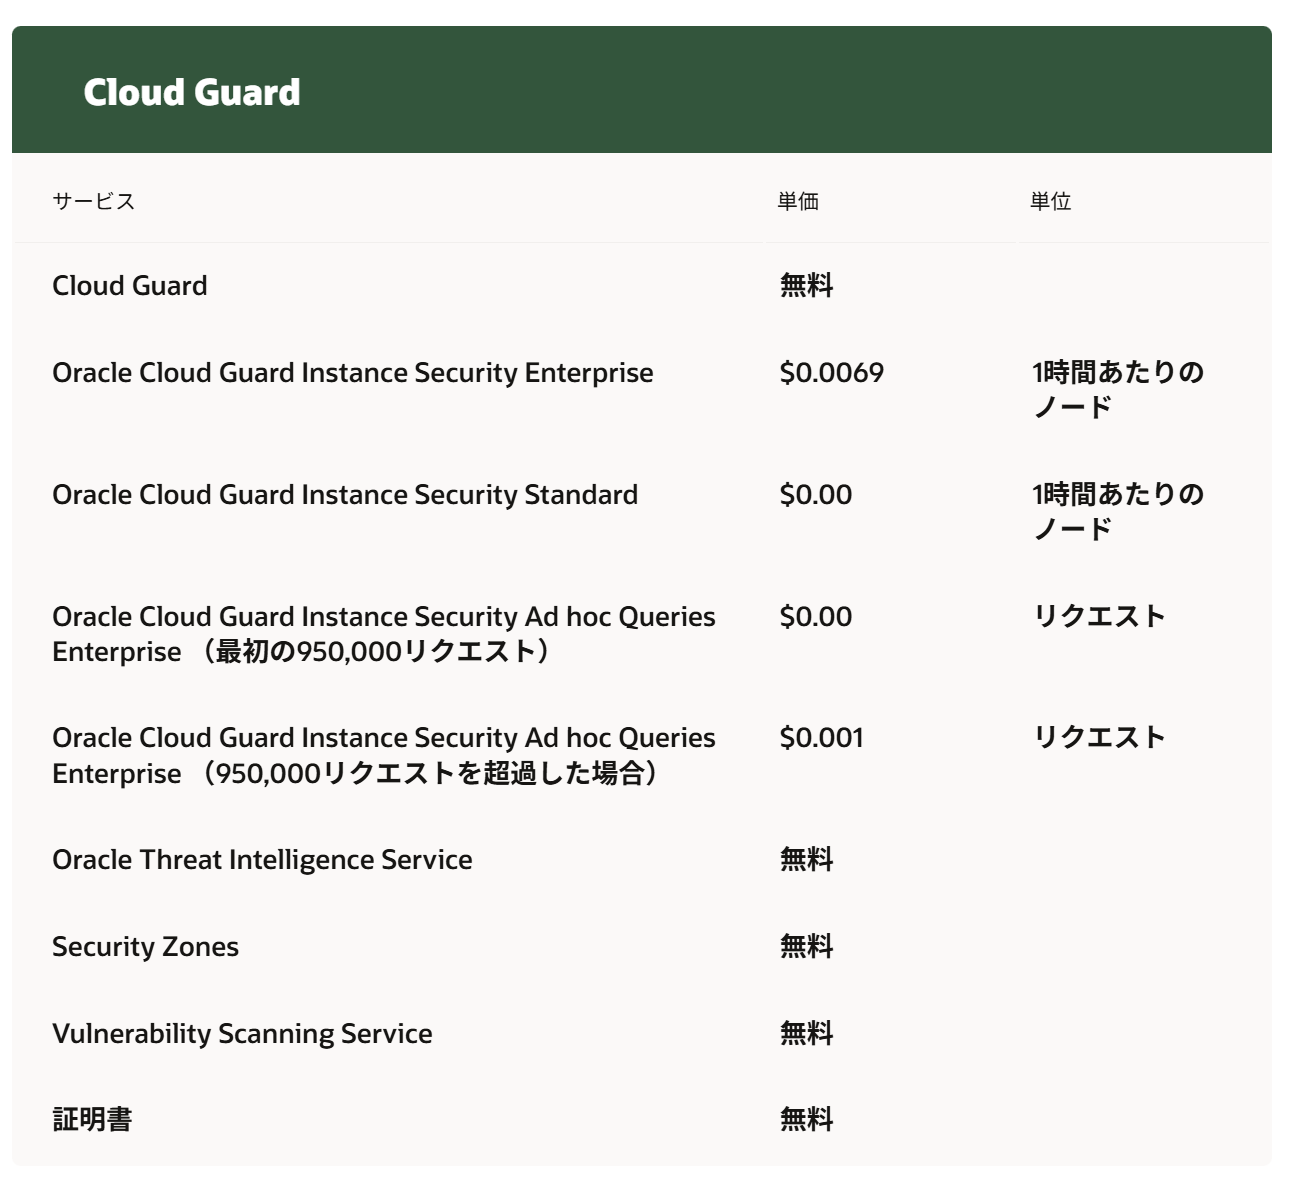
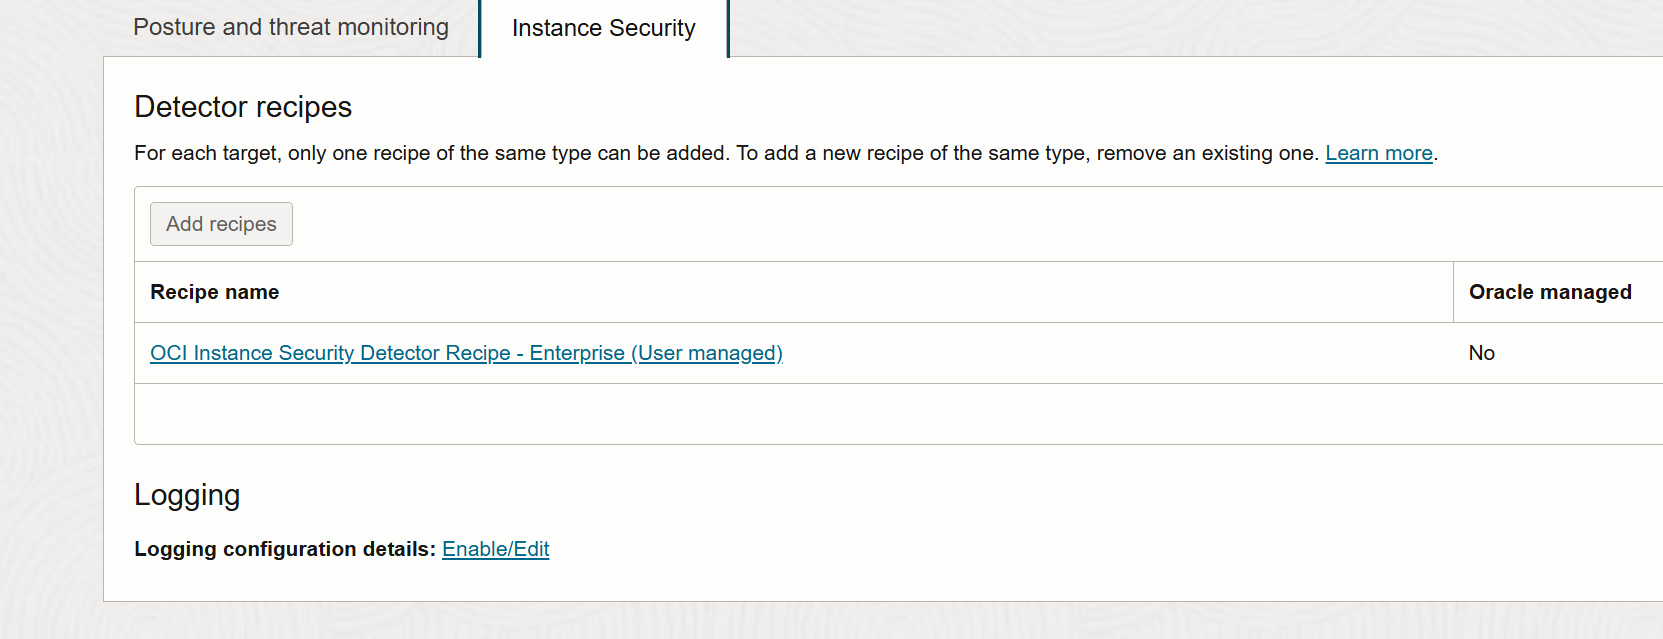
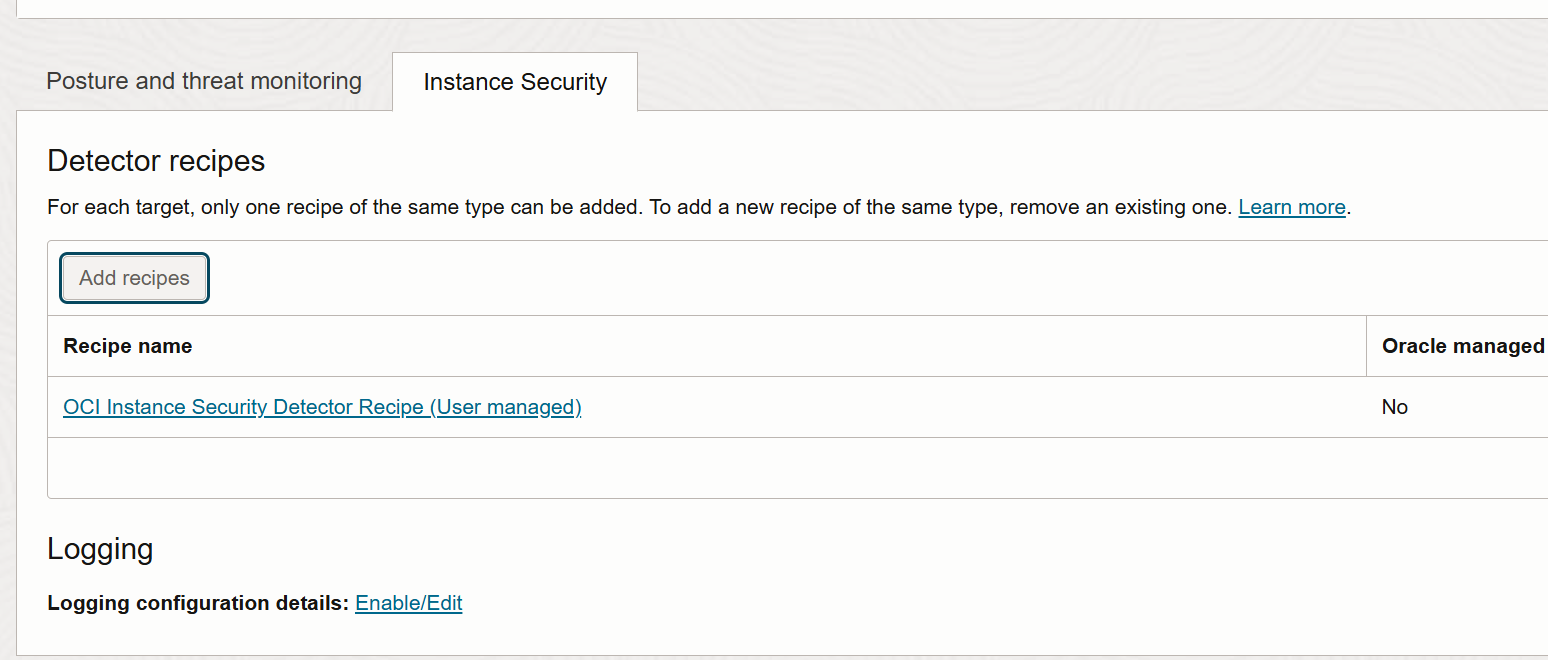
Identity & Security > Cloud Guard > Configuration > (Cloud Guard Target) > Instance Security tab
Enterprise のレシピを外してStandardのレシピをつける
remove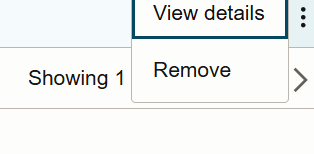
Add recipes
これで数日様子を見る。
止まった(^▽^)